And now - for something completely different.
I’ve been considering getting into Flames of War, but before pulling the trigger on a Starter Set, I thought I’d paint a few WW2 (individual kits from Zvezda). I’m planning to paint one tank each for Germany, UK and Russia, and figure I’d start with a German Panther, going for a “german gray” look.
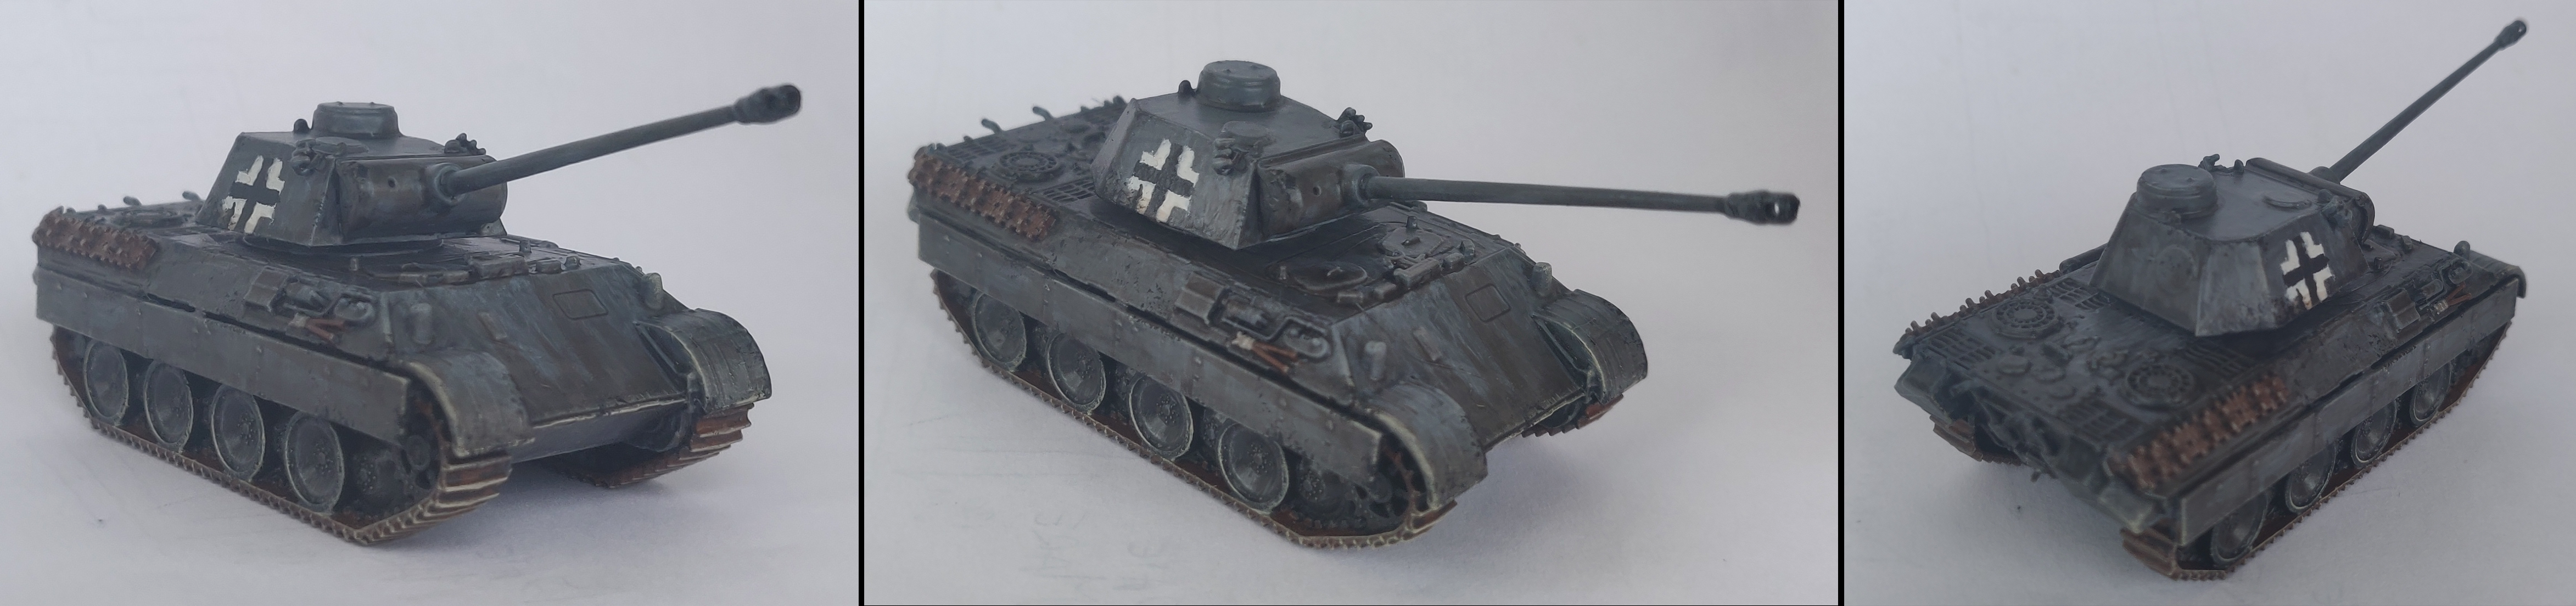
I’m pretty happy with the final result - except perhaps the decal, which was my first time hand-painting decals. If I do end up getting into Flames of War, I’ll probably switch to using actual decals rather than painting them.
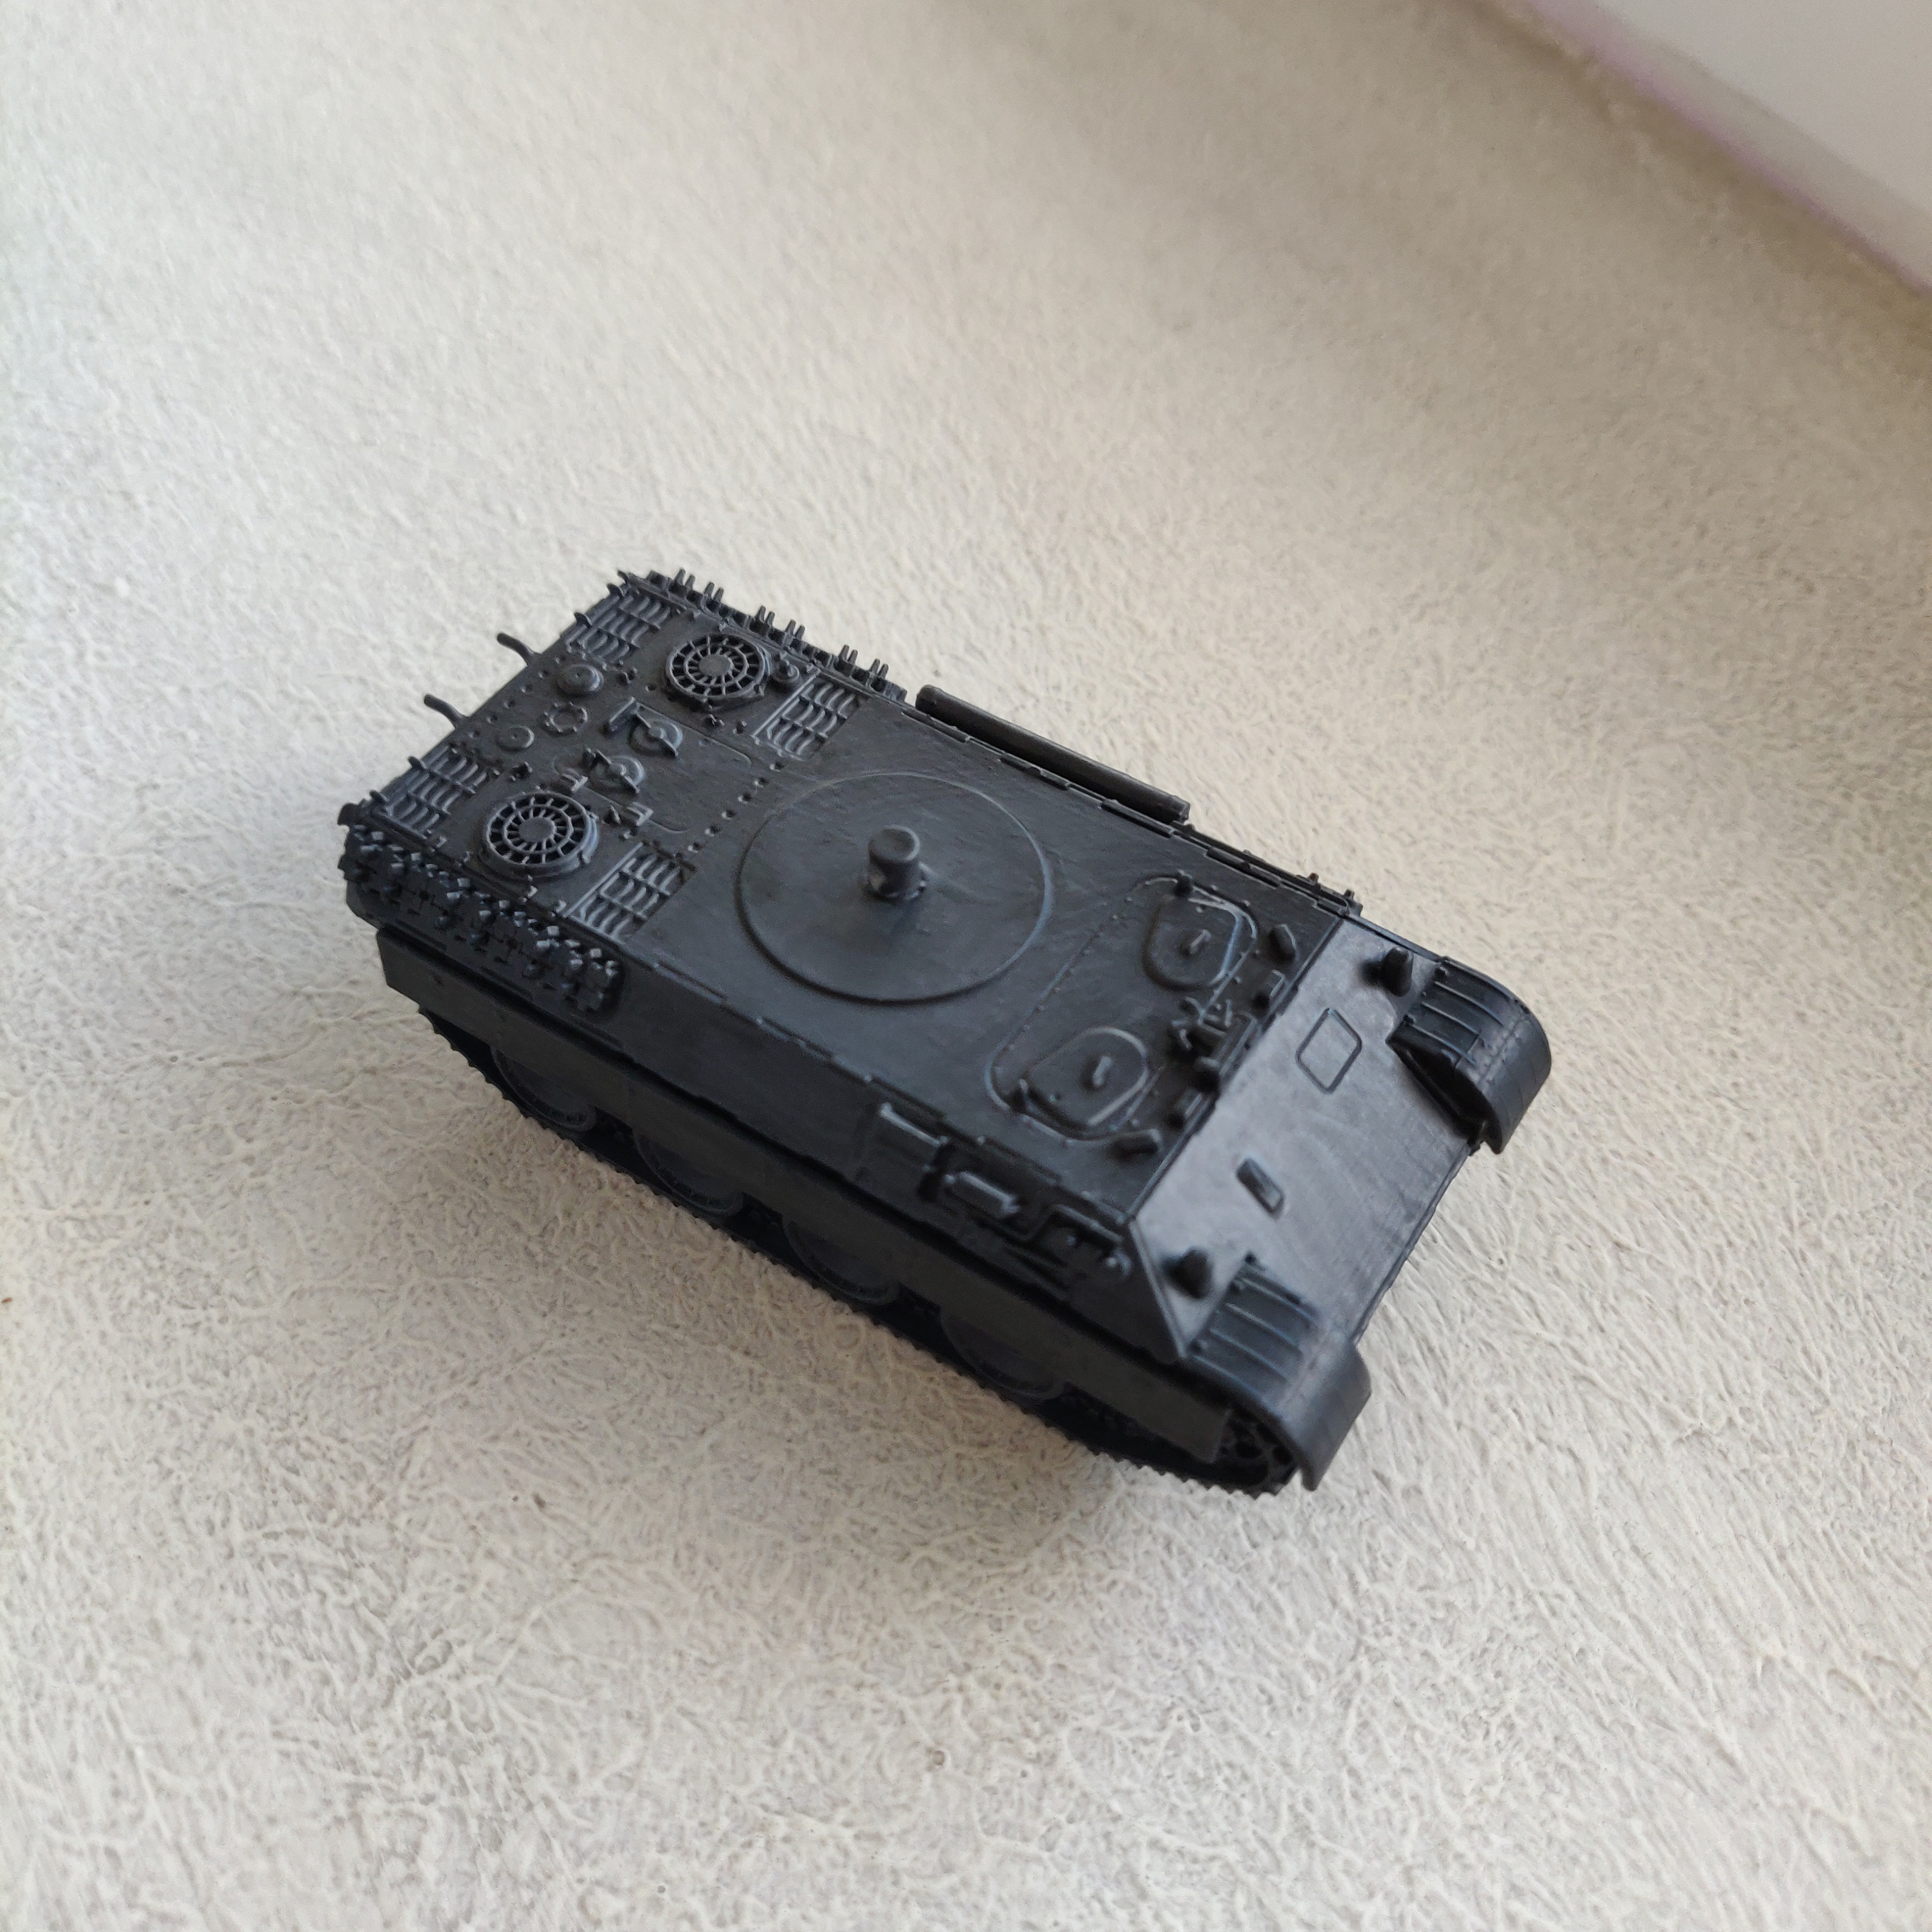
Assembly
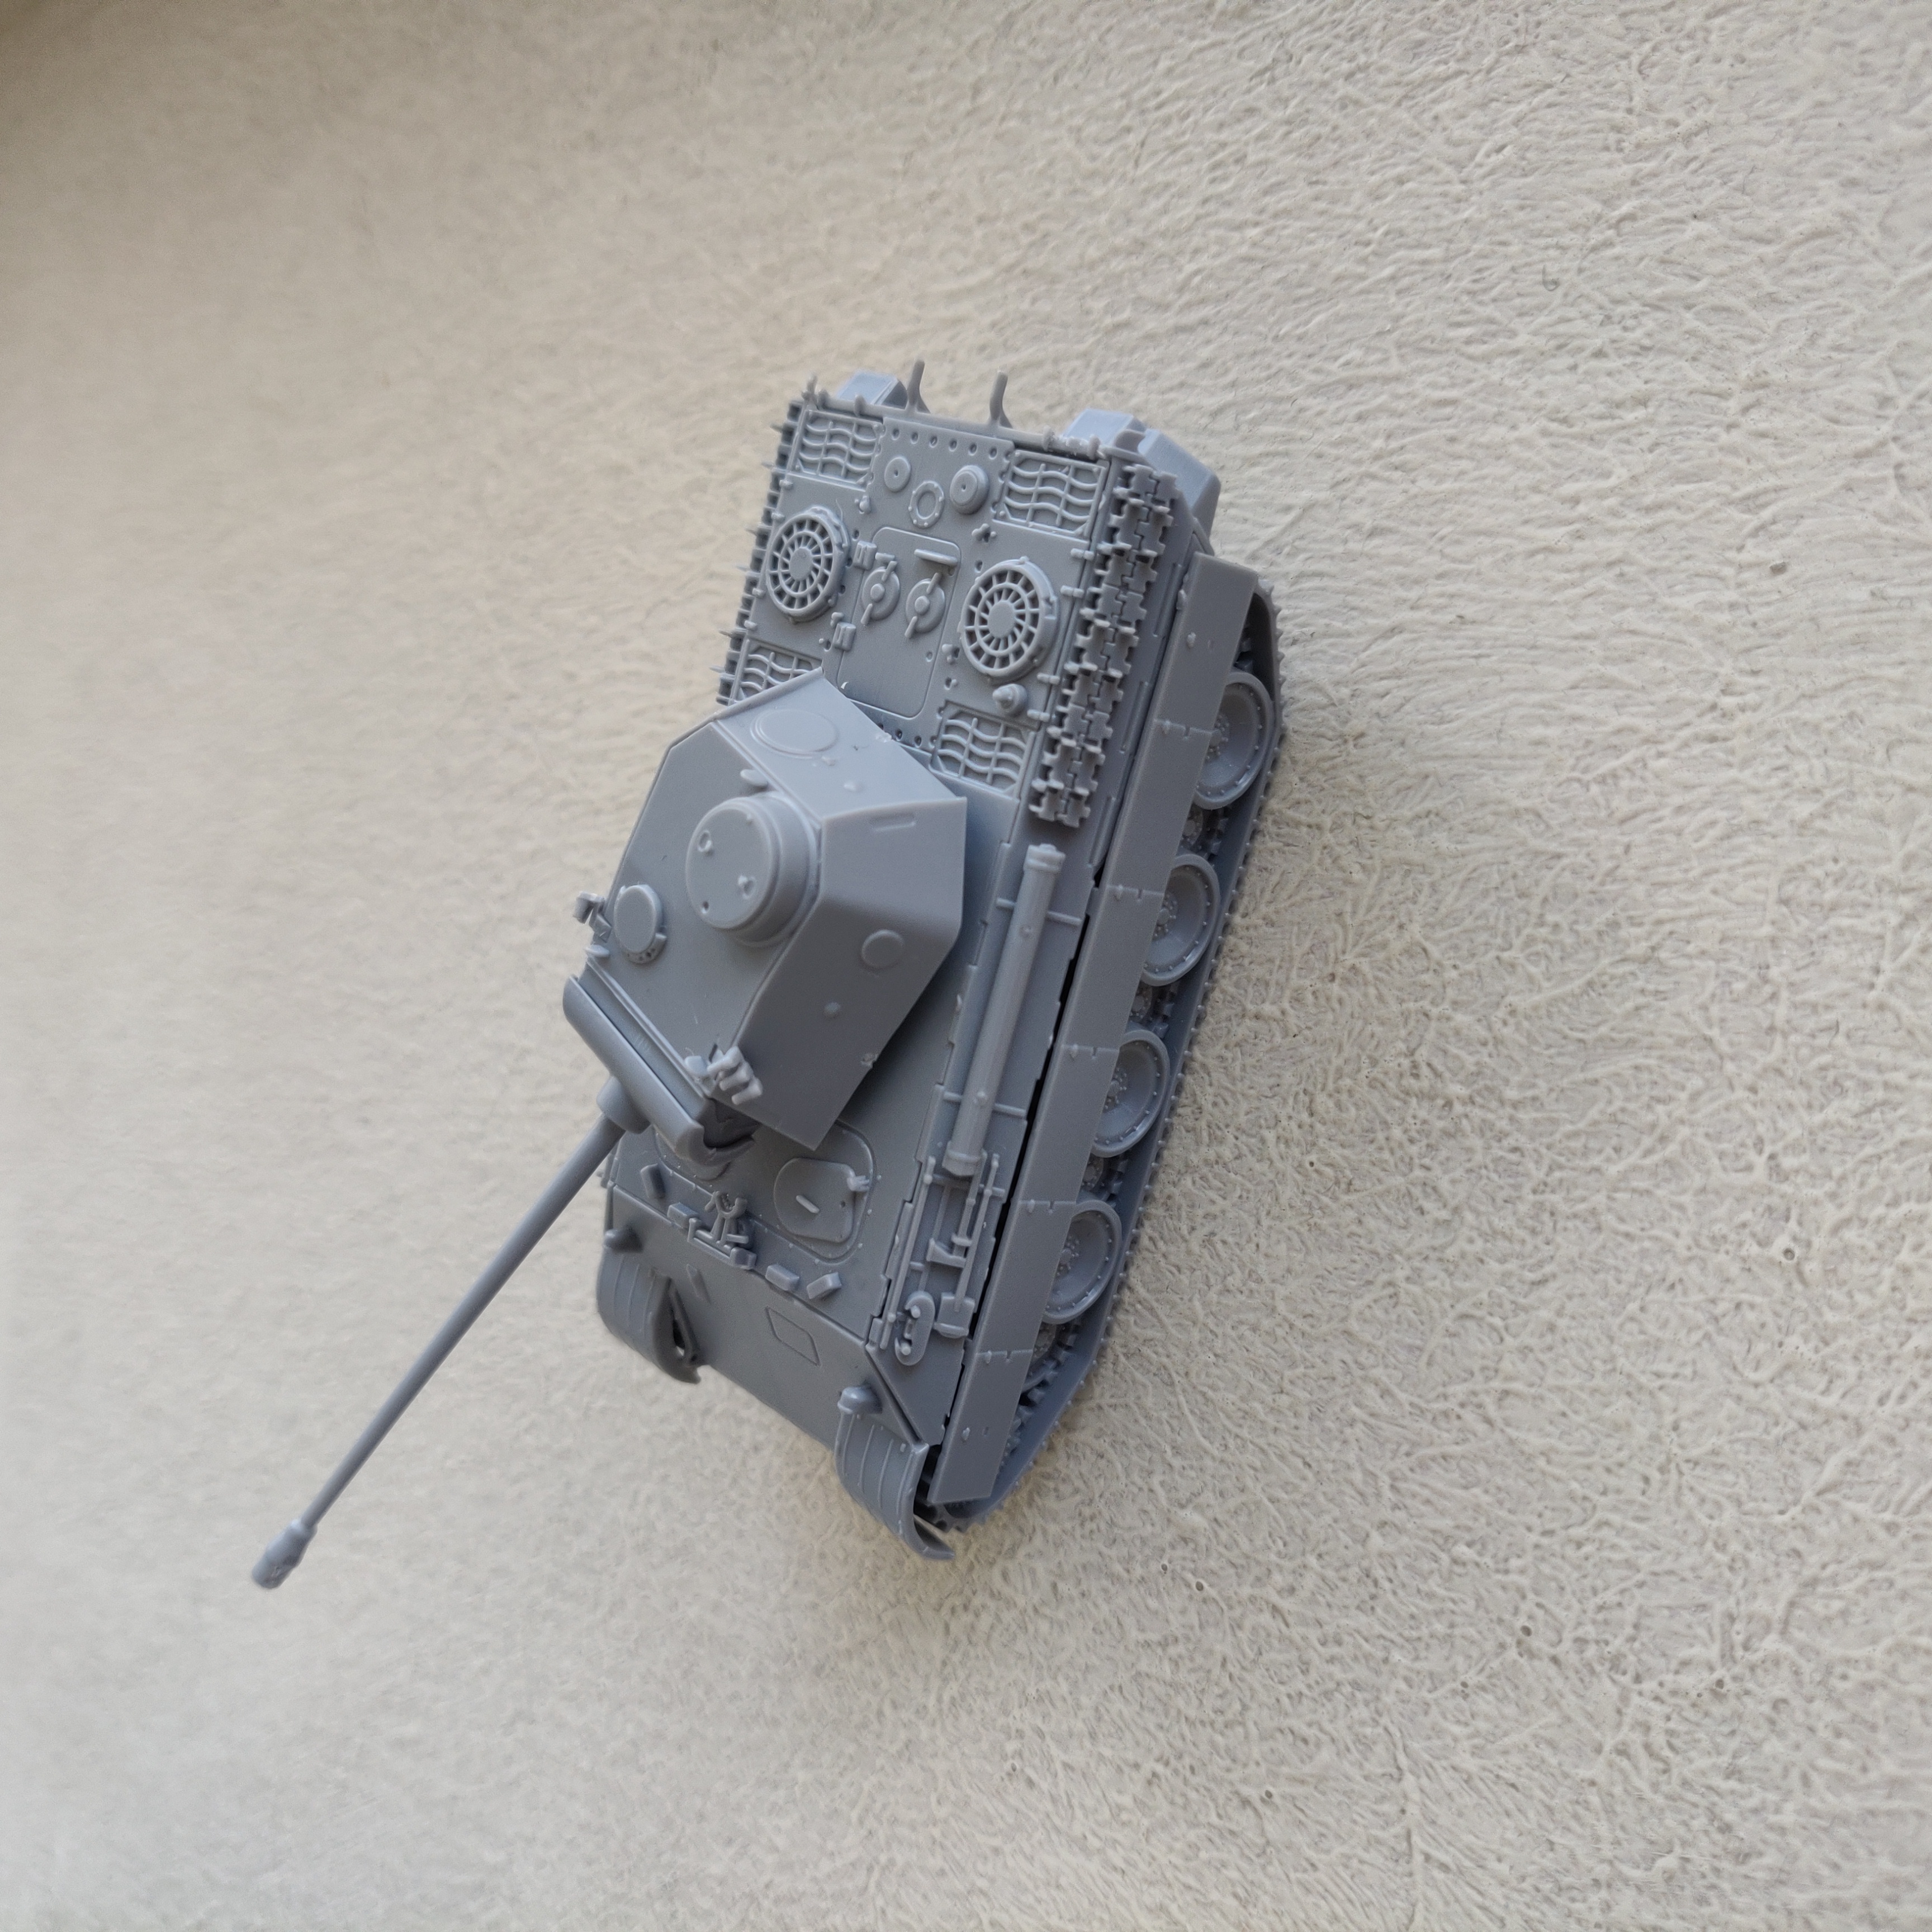
Assembled the Panther as per the instructions, using a tiny amount of super glue for the middle and top sections (since I expected those to be grabbed the most and the joins seemed pretty flimsy). The other components snapped together pretty easily, didn’t use any glue on those.
The most problematic were the two vertical rectangles on each side. Those are visibly “detached” from the rest of the tank and the connections were very weak, I essentially had to glue the connectors in place.
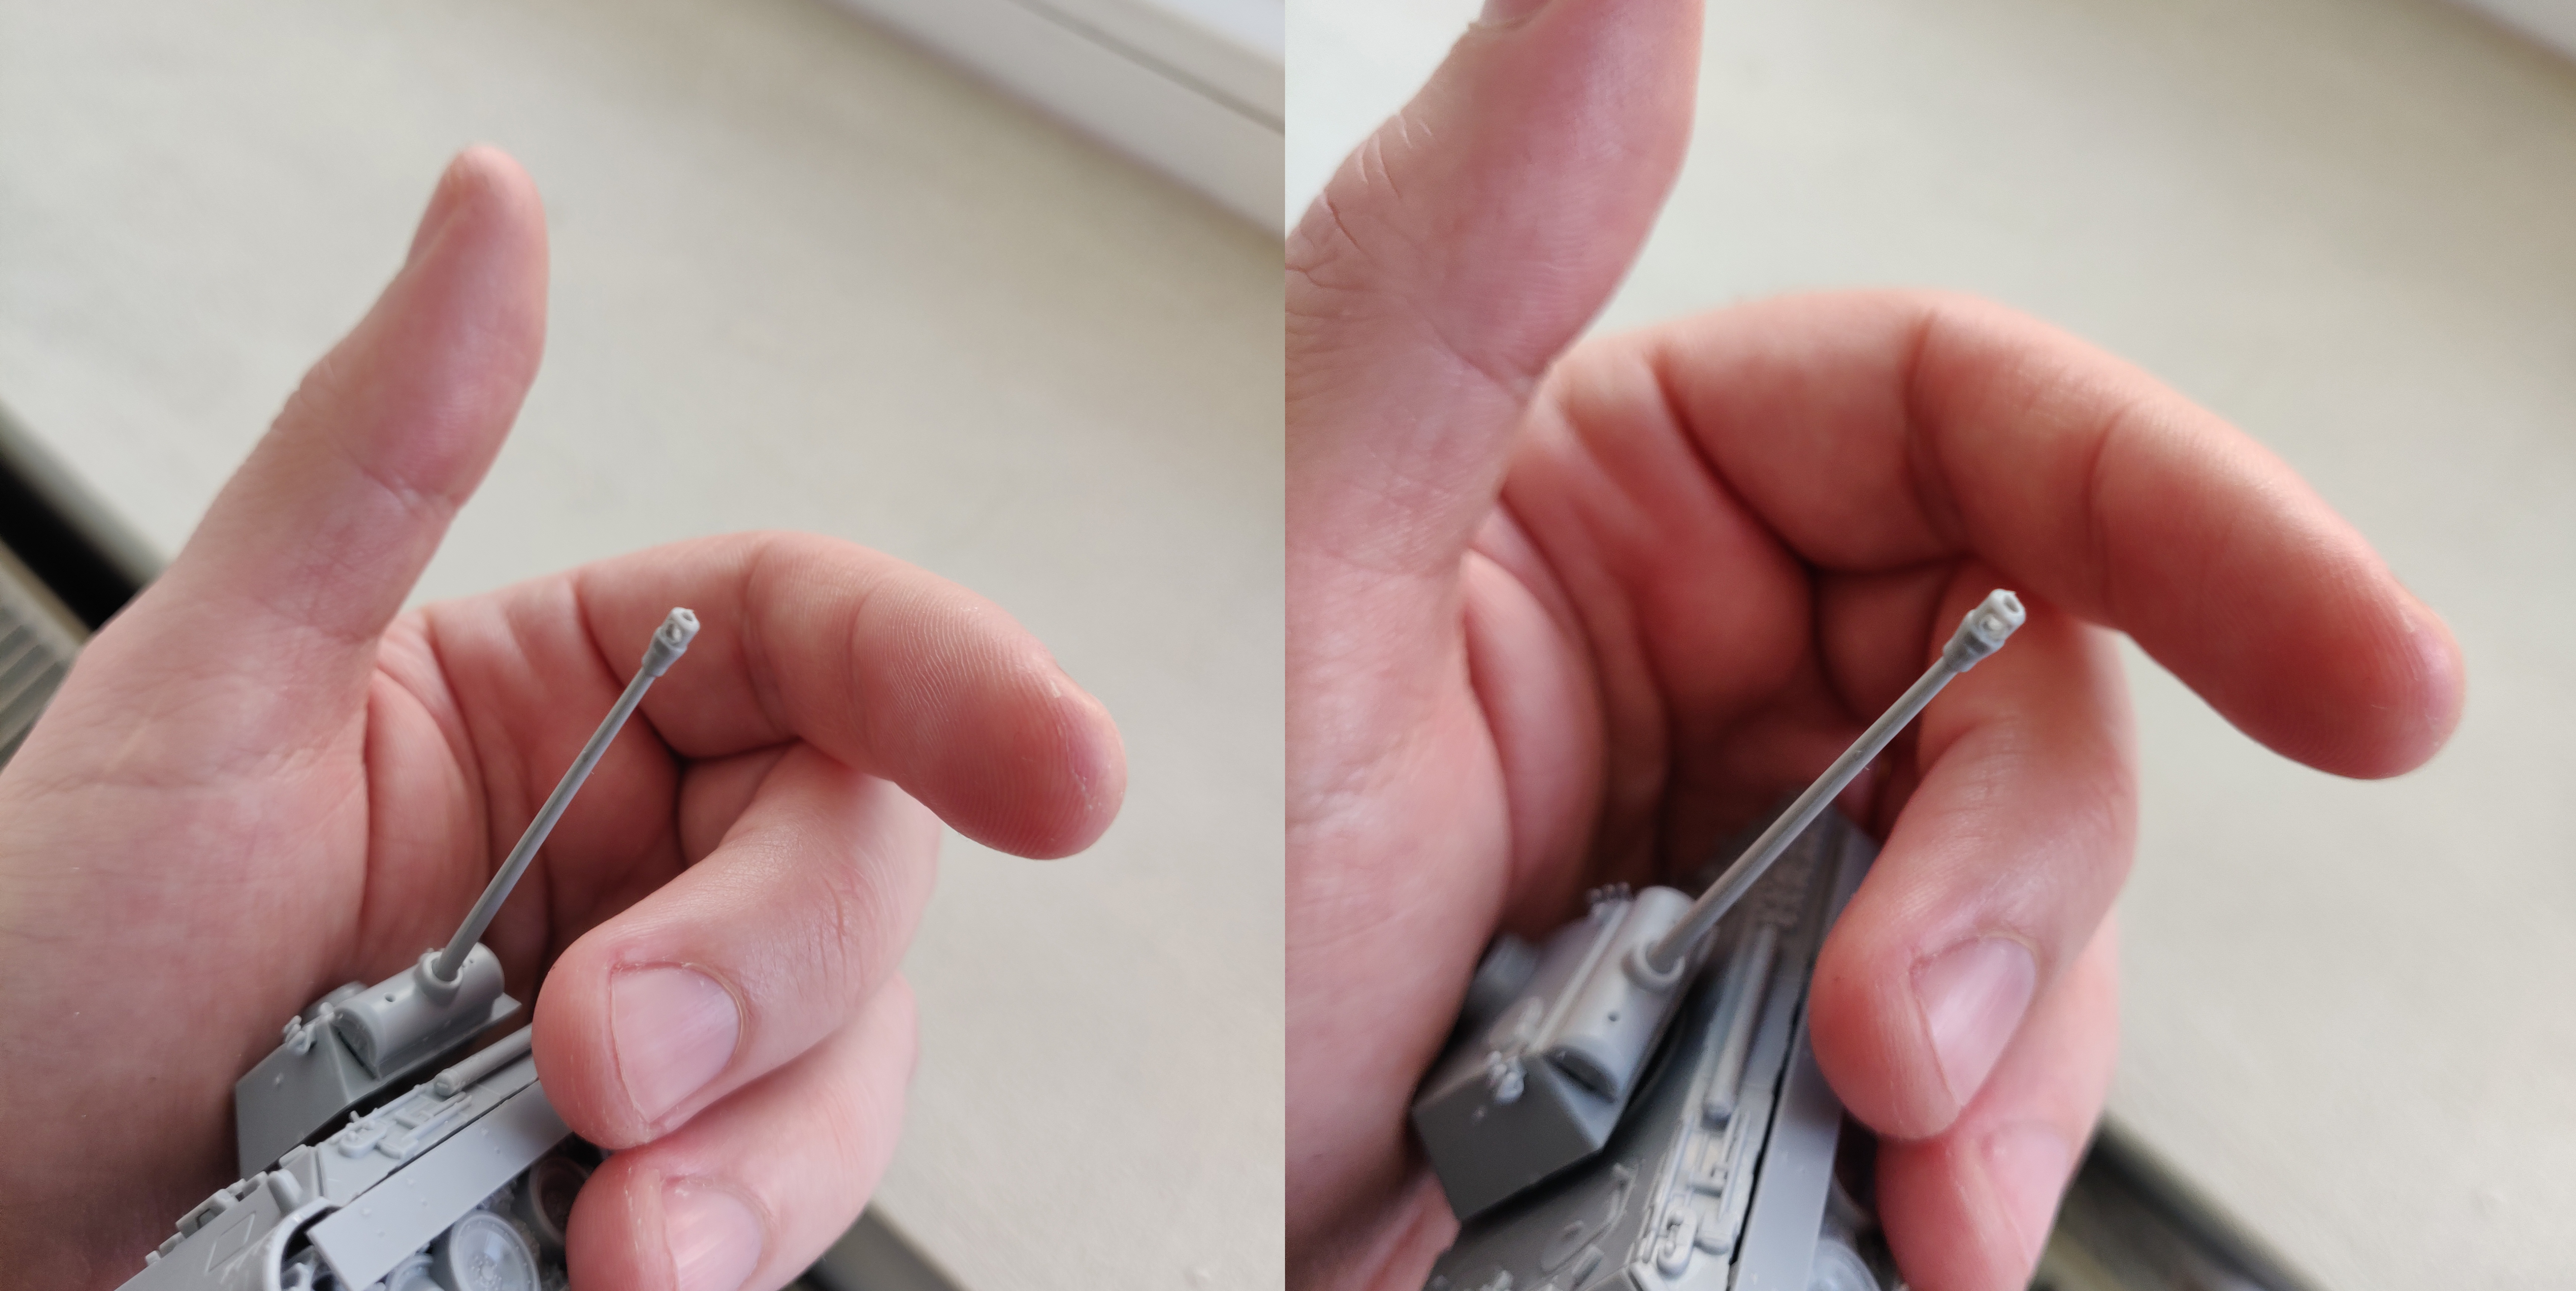
I used a jewelry hand drill to drill the end of the barrel (one hole for the exit and two side holes, all of them connecting in a T shape). By side holes I of course mean the “muzzle brake” (learn something new with every miniature). There were two smaller side holes behind the primary muzzle brake, but I didn’t have a drill small enough for those and they weren’t circular. Shouldn’t be an issue in the end as they’re quite small and I’m planning to paint them black.
I didn’t push the turret all the way down at this point since I’m planning to paint it separately. The tracks also seemed worth painting separately, but I decided against it since the areas that will be hard to reach are hard to see anyway.
Painting
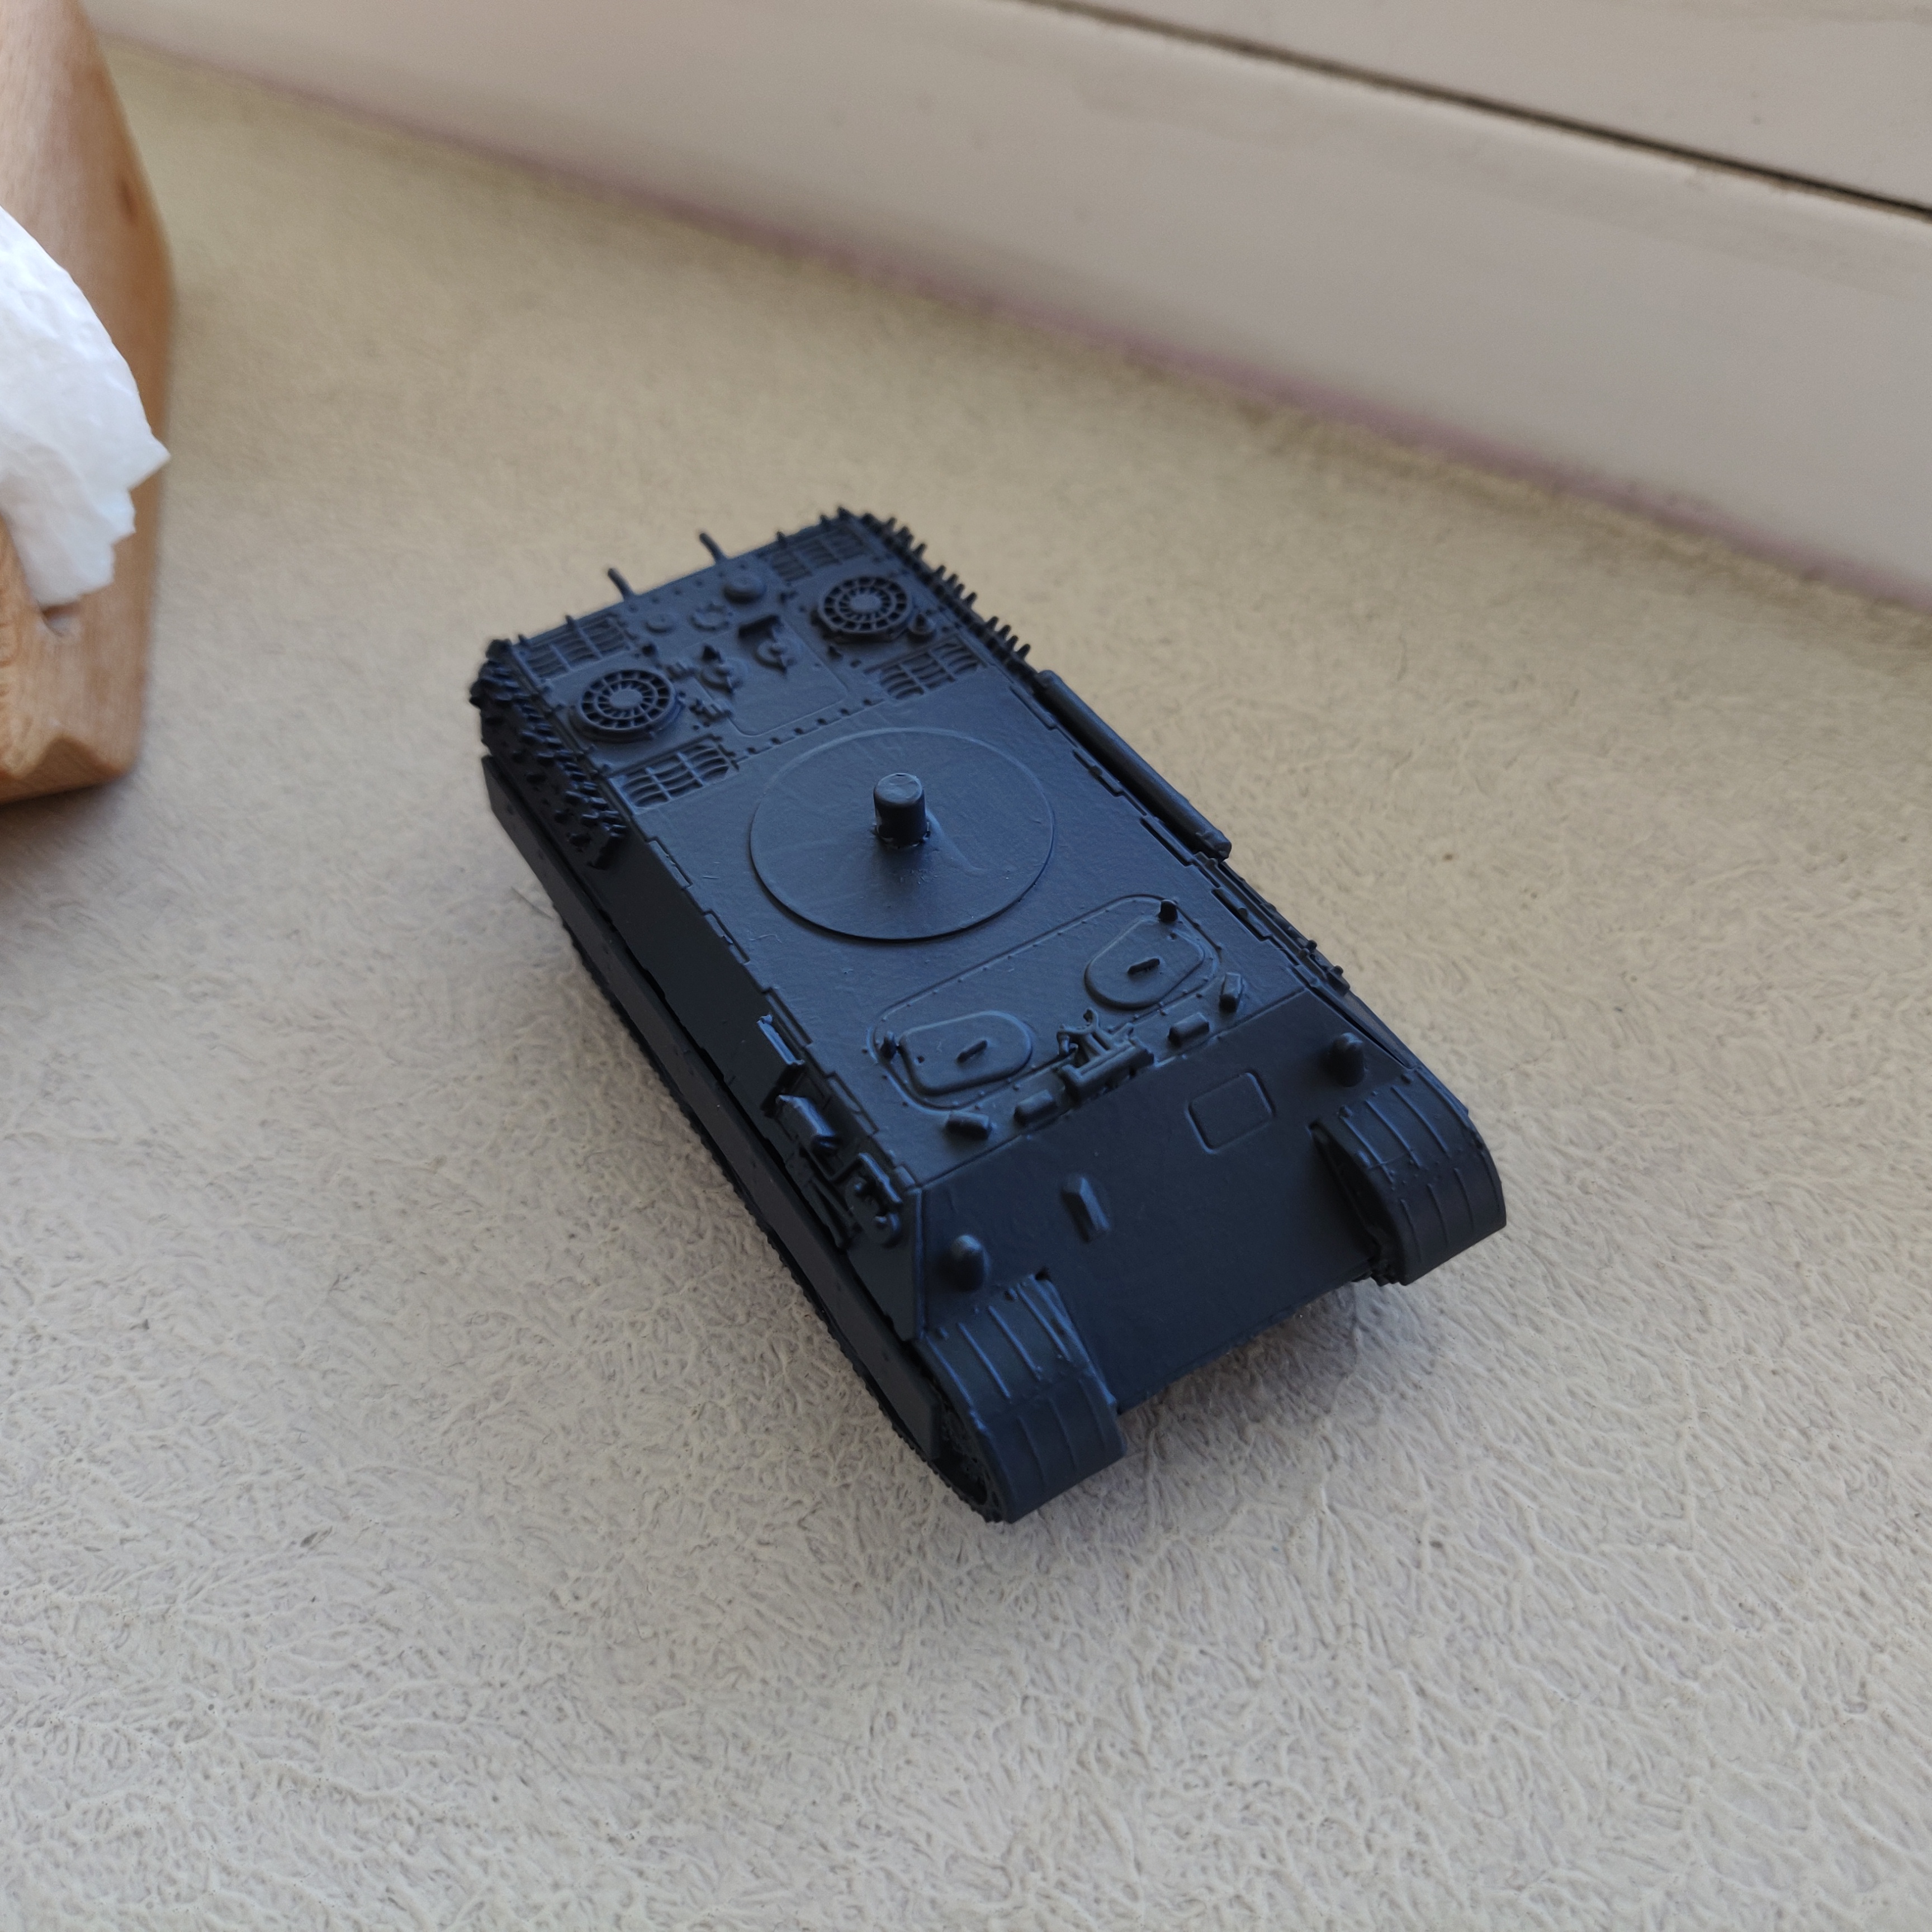
Base coated the tank (in two parts - the body and the turret) in three (yes, three!) layers of Eshin Grey. Not sure if it’s the plastic (perhaps it’s very glossy?), but the base coat needed three layers in order to get a uniform finish. Basically paint just refuses to stick as well to this mini compared to what I’ve previously done.
Applied a layer of Nuln Oil to everything, trying not to let it pool too bad on flat regions with no details (such as the walls of the turret or the front armor panel on the body).
Applied a dry brush of Eshin Grey, then a dry brush of Vallejo Neutral Grey in order to increase the contrast on some of the details.
The initial result was a bit too dark for my taste, plus I realized I wanted a more bluish undertone in order to match the “german grey” look I was going for.
To fix that, I mixed Vallejo Neutral Gray and White (in about a 2:1 ratio) and added just a touch of Citadel Macragge Blue in order to give it a bluish note. Before applying it to the miniature I added more water than usual (but not enough to turn the paint into a glaze), then applied the paint pretty loosely to the majority of the model (except the underside and tracks). The paintjob was not uniform - I tried to get more of the paint on in top areas, even if that meant a slight “smear” effect. Once dried, I applied a coat of Nuln Oil to tie everything together.
Next step was to apply Citadel Mournfang Brown on all of the tracks (including the spares on the sides), as well as the wooden handles of the various tools. Fixed any mistakes I made with the earlier mix of white, gray and blue. Finally, applied a dried brush of that same mix, which not only brought out some of the details lost in the wash, but also helped tie everything together (including the most recent fixes after the brown).
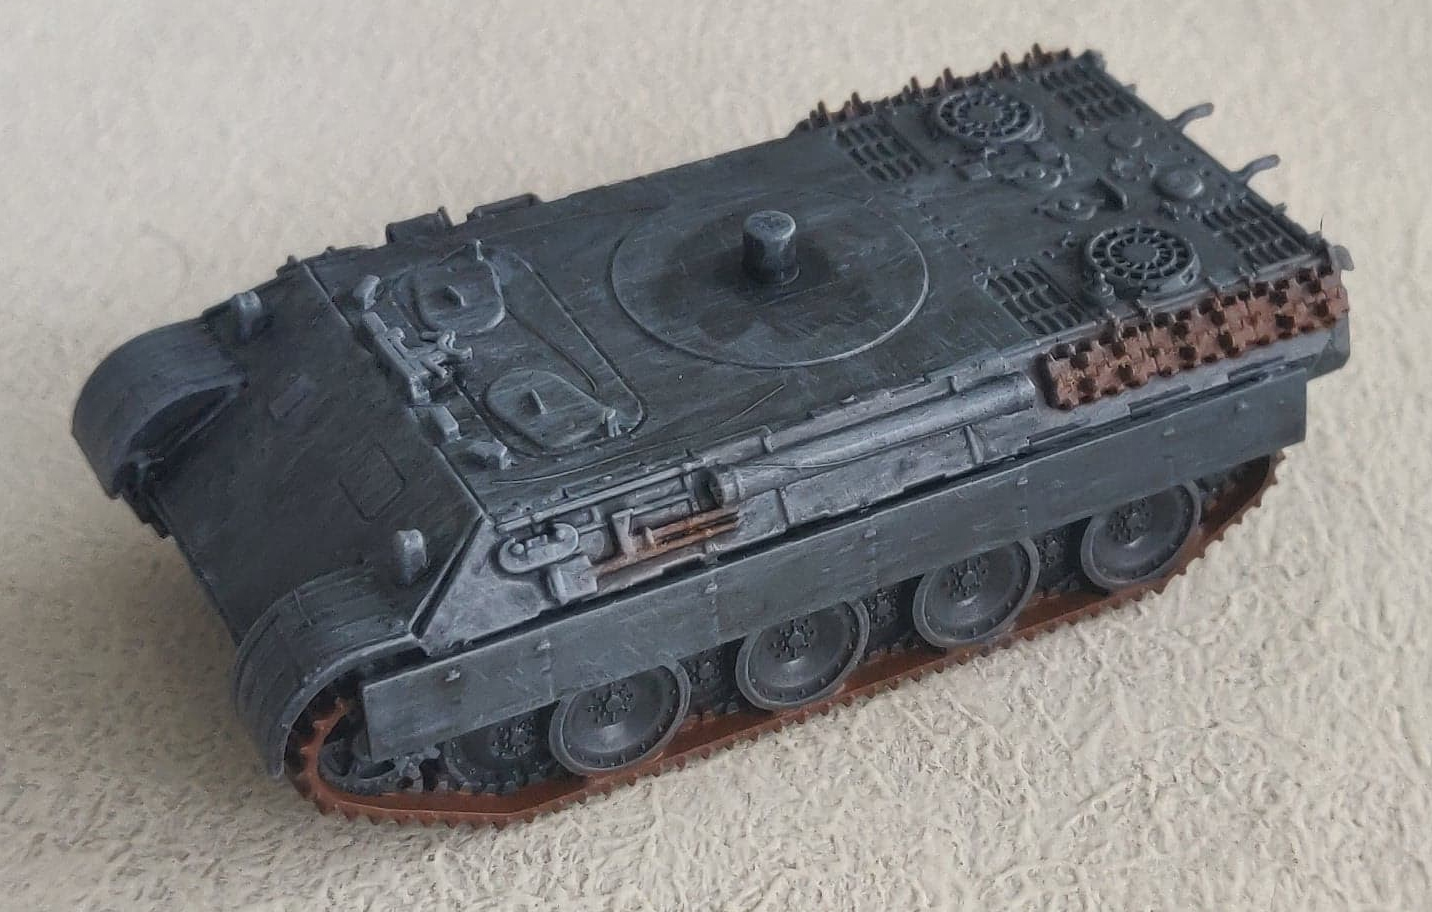
Following this I worked some more on the details, painting the edge of the tires black (using Citadel Abaddon Black) and parts of the tools silver (using Citadel Runefang Steel). I also applied a dry brush of Runefang Steel to all of the tracks, including the spares.
With the broad areas of the mini painted, it was time for the finishing touches.
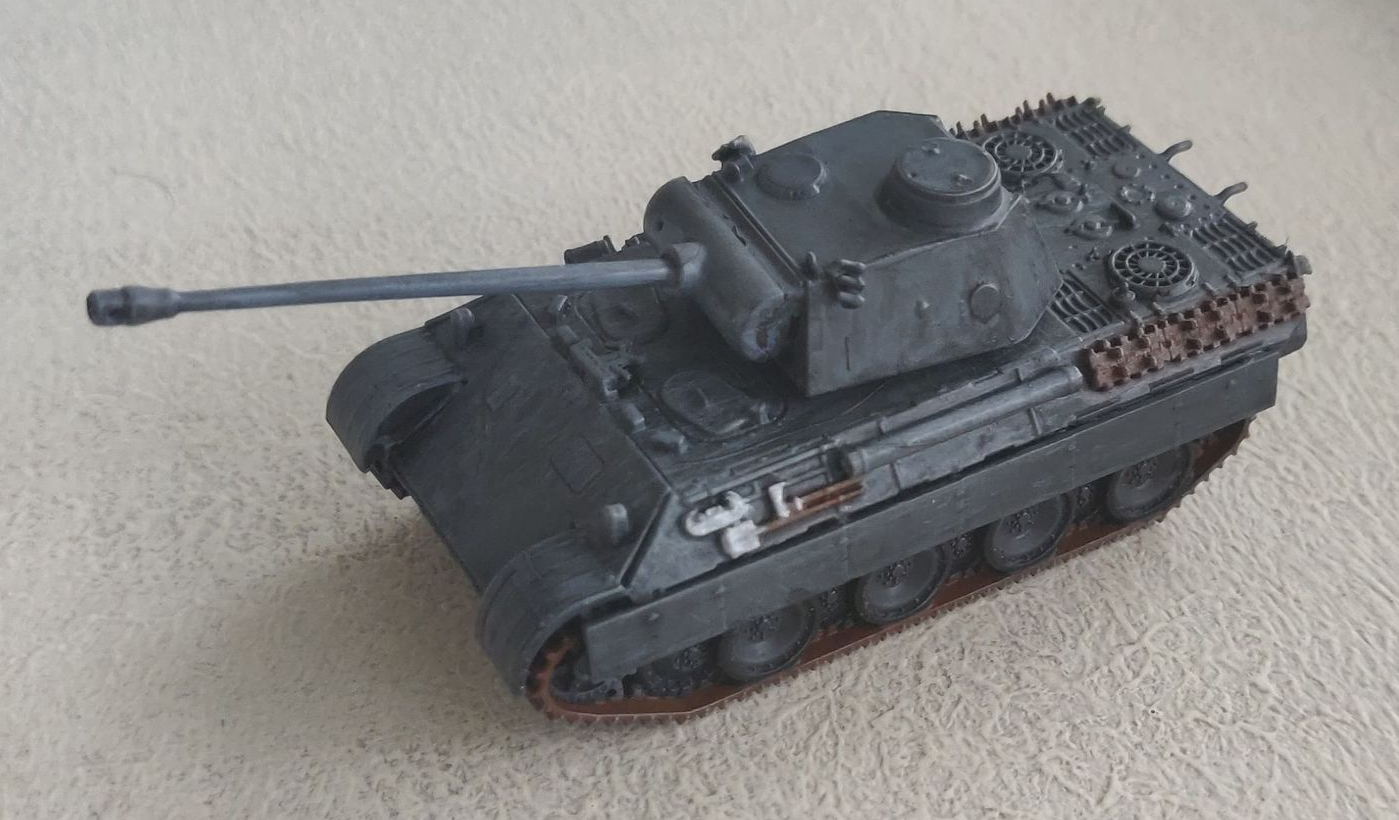
First up, I painted the German logo on one of the turret’s sides. I tried to use masking tape, but for some reason paint would keep going under the tape, so I had to free-hand most of it.
Next, I applied Agrax Earthshade to all of the brown bits, as well as in various areas of the model where I wanted it to appear grimy (but not over the entire model as with the previous wash).
Next, I did a dry-brush of Citadel Ushabti Bone over the tracks and lower part of the tank, in order to simulate dried-out mud.
Finally, I sponged a bit of Abaddon Black in random spots all over the tank in order to simulate battle damage.
Once everything was dried, I applied a single layer of Citadel Stormshield for protection, which I did in two separate sessions (because I needed to hold onto the mini while painting it), with about an hour between sessions in order to allow the varnish to dry completely.